Workshop Guide to Seat Recovering
by Steve Cooper, VJMC Editor
At some point when owning an old bike it’s likely that the seat will need recovering. There are several well-known companies that offer an excellent service but for those who like to get hands-on with their vehicle, here's my step by step guide to seat recovery.
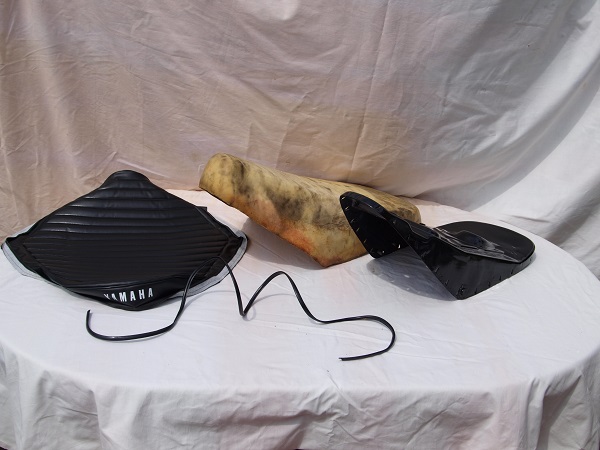
Undoubtedly the best way to start off is with a genuine seat cover and surprisingly quite a few are still listed by manufacturers or available at shows, via eBay etc. An aftermarket copy may be fine but if you can get a replica made to the original pattern it’s probably a better bet. If the seat pan is rusted through or cracked it’ll need to be repaired either by welding or fibreglass. Also, make sure the seat foam is viable or you will never achieve a decent job. So here we go with the all-important edging strip, a new cover, seat pan and foam.
Rule number one is ensure everything is warm; try fitting a cover in a cold garage and it’ll be hard work and probably turn out wrong. Either a nice warm room or outside in the sun makes the job so much easier. Working off a soft surface, the edge trim is fixed to the seat base and the foam checked for quality of fit.
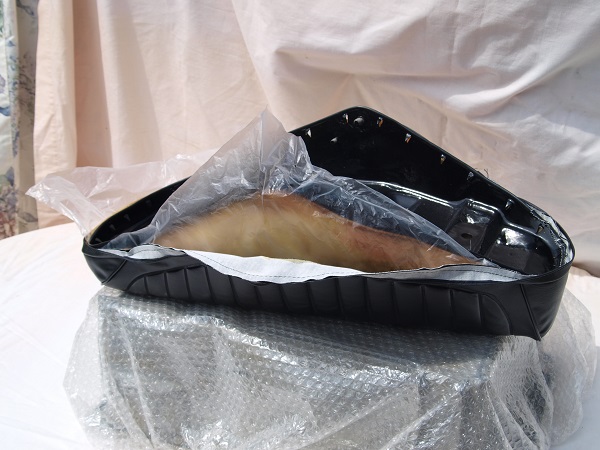
If the edge trim is damaged or unavailable I add a double thickness of duct tape to the edge of the pan to stop the cover tearing when it’s hooked down in place. The single biggest issue I’ve found replacing covers is getting them to move fractionally when I need to adjust the position. The trick here is to add a layer of thin crinkly polythene between the cover and seat foam; this allows one to slide over the other. Serendipitously the bag the seat cover came in is ideal and fits a treat.
Getting the cover correctly in position is pivotal to the final appearance and the key lies in getting the front and back of the cover spot on. Using a rule, tape measure and a keen eye the front is manoeuvred into place and held with some pincer cramps out of the local supermarket; their rubber faces ensure the cover isn’t marked.

Applying the same MO to the rear of the cover and ensuring the all-important lettering is central and horizontal, I can apply some more cramp the edges making sure nothing is rucked or creased.
Before taking the old cover off, it’s really worthwhile making a few measurements as to the depth of the side skirt relative to the edge piping or welded seams; this will give a good indication of how tight or loose to pull the new seat cover. To assist transferring this dimension over to the new cover correctly, I use either a piece of masking tape or make a removable mark with dressmaker’s chalk.
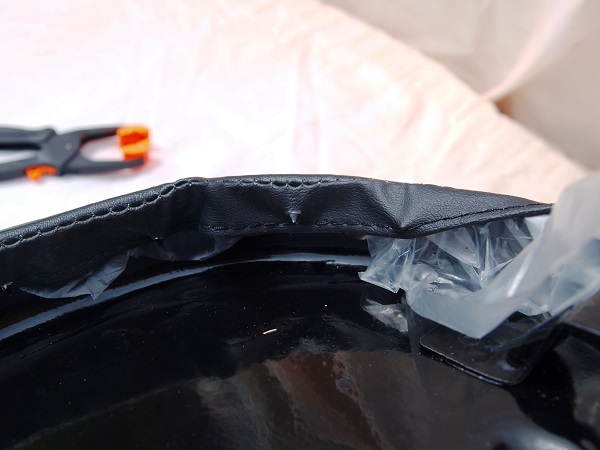
Assuming everything is in place and the back and front appear as I want them to, I can now start hooking the cover in place over the pressed tangs or dragon's teeth. The majority of seat covers are based on a strong woven base material and it’s the integral strength of the fabric’s weave that holds everything in place. The tangs can be a bit fragile over time so I make every effort to only move them if I have to. I’ve found that if after removing the old cover I leave to tangs pointing toward the underside of the seat base at an angle of 60-70 degrees, I can loosely secure the cover in place but remove or adjust it if necessary. Here I’ve hooked a portion of the cover by just piercing the underskirt by a few millimetres.
Working on the front and back first I secure the critical ends of the cover in place then alternate working back and forth across the sides, gradually fixing the entire cover in place but still only just hooking it down by the all-important few millimetres. This way I can easily adjust or reposition if necessary and know the cover is being unnecessarily weakened. I take measurements and compare them to my readings taken from the old seat cover. Now is the point where I can make any changes if necessary. Occasionally one or more of the tangs is either missing or falls off due to rusting or metal fatigue. In a situation like this, I trim away any residual crinkly plastic and wipe the area down carefully with some methylated spirits in readiness for a quick dodge a little later on.
Now I can begin to fit the cover permanently but before I do I’ve turned the seat over the right way and checked it from every angle to make sure I’m happy with its positioning. Starting again with the front and back I remove a pincer clamp and fully bend down the corresponding tang. Rather than risk my thumbs I use the back of an old spoon which makes the job easier and safer. Once more the front and back are secured in place first and the seat is checked and double checked for alignment.
Next, the sides are fully pinned down and I work back and forth from side to side keeping an even tension across the seat surface. As each tang is pushed home it pulls the cover down tight by a 3-6mm and it’s the cumulative effect of this leverage that finally draws the cover down snug and skin tight to the seat foam. Assuming the positioning was initially correct the cover should now look pretty much factory fitted.
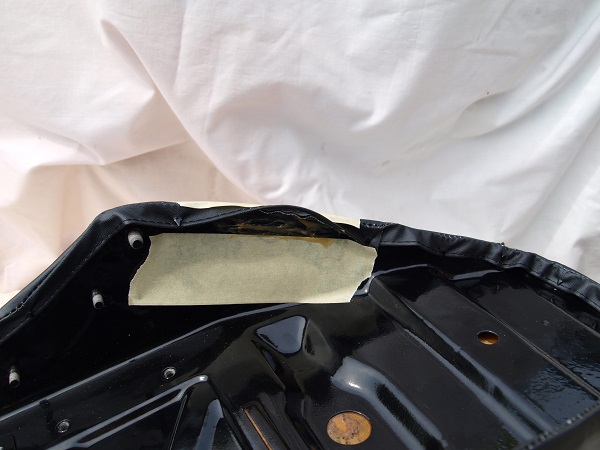
Back at those missing tangs; I’ve masked off the seat base below the damaged area and carefully added a reasonably thick layer of contact adhesive to both the edge of the cloth backing of the cover and the seat base.
Allowing a good fifteen minutes for the glue to dry I then fold the cover edge over onto the seat pan ensuring that I maintain the same tension used for the rest of the cover. A second pair of hands here makes the job easier. Adding some precautionary masking tape to the outer face of the seat cover I hold everything in place with the pincer clamps and give the glue as long as possible to fully bond and cure.
With the clamps removed and allowing the edges to recover from being in compression, the seat is left to settle in a warm place for a few hours. A couple of gentle thumps and a wee bit of kneading of the foam has the seat looking better than I dared hope for. That’s another job done and more importantly, money saved and another new skill acquired. I pronounce the seat a job well done and sit down to watch MotoGP safe in the knowledge that I’ve earned an hour off.
For more technical advice, visit Motorcycle Workshop Guides: The Complete List.
To find out more about a classic bike policy from Footman James and to get to an instant quote online, visit our Classic Bike Insurance page.
The information contained in this blog post is based on sources that we believe are reliable and should be understood as general information only. It is not intended to be taken as advice with respect to any specific or individual situation and cannot be relied upon as such.

COMMENT