workshop guide to stroker oil issues
By Steve Cooper, VJMC Editor
When the Japanese embraced two strokes with open arms they did so for one reason and one reason only...simplicity. Cheap and easy to make accurately, the humble stinkwheels rapidly became a cash cow. With the advent of tuned exhaust systems, disc valve induction, squish band cylinder head technology and optimised porting the bikes just got better and better.
Yet perhaps the most significant development or enhancement in terms of owner/rider benefit was the fitment of oil injection pumps. Each manufacturer made huge capitol of this quantum leap for the humble stroker and to all intents and purpose it removed the last genuine objection to owning a two stroke. With no messy premix to muck about with all the owner had to do was make sure the oil tank wasn’t running low and then the road was theirs for the taking.
With oil consumption levels better than many British four strokes there really was no logical reason to complain about practicality either. We may take automatic oiling for granted but occasionally things can and do go wrong. We’ve previously looked inside a Yamaha pump which is at the heart of any two stroke lubrication system but what about the peripherals? Do they fail? What are the tell tale signs? Can they be fixed and if so how? Read on for snap shot of two stroke oiling issues and possible fixes. 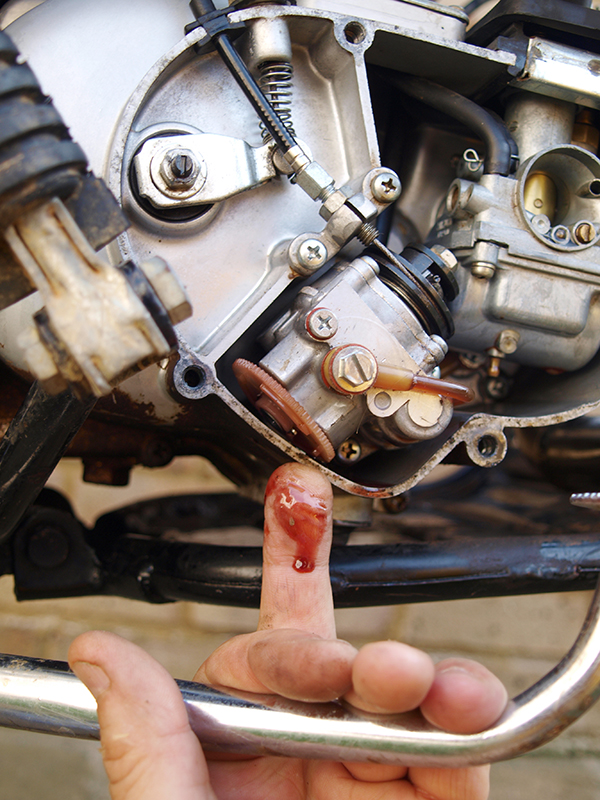
Yes it could well be the oil pump itself leaking but equally it could be the outlet union or even the gasket behind the bleed screw. All and any should be thoroughly investigated. 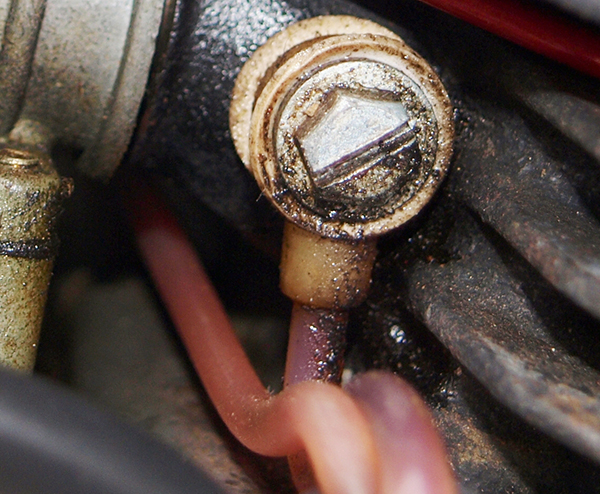
At the delivery end up at the point of injection into the inlet track there’s evidence of another leak. It might just be a loose union but equally it could also be a cracked pipe.
A puddle of oil on a crankcase should always ring alarm bells. If oil’s leaking out the engine’s being deprived of vital lubrication. 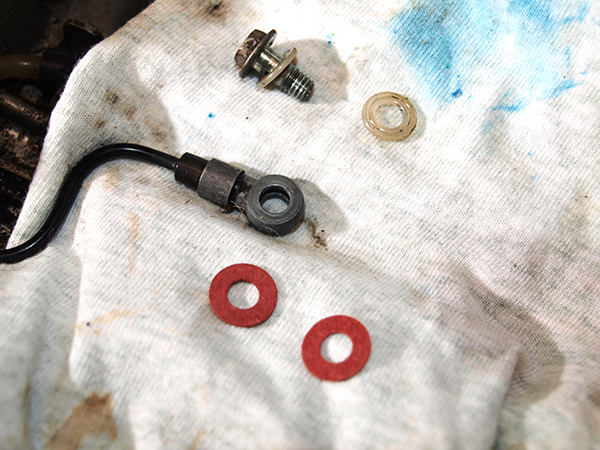
You’ll struggle now to find the OEM washers used on oil line banjos. On alloy or steel unions you can use a soft copper washer but fibre or plastic washers are normally kinder to the gasket faces.
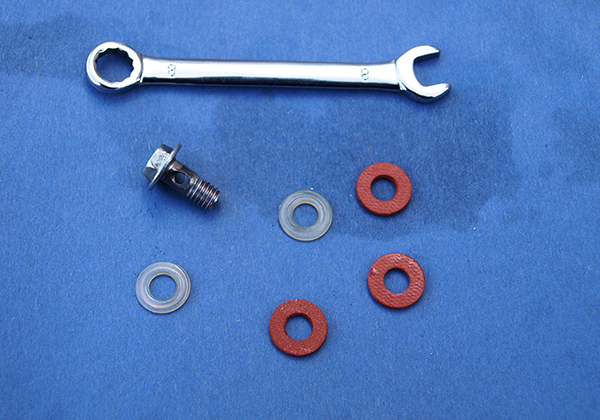
Ensure replacements they are the same diameters internally and externally. Thickness isn’t generally an issue as long as the oil feed hole is not obscured. Use the correct spanner and don’t over tighten!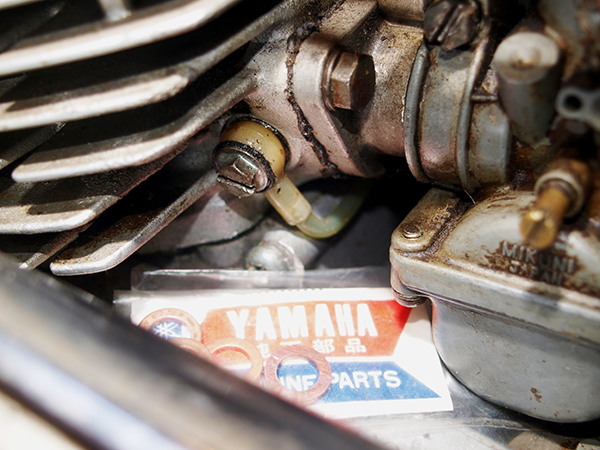
Those black rubber washers are aftermarket tat and Yamaha’s listed replacements are copper which will damage the hard plastic banjos. Fibre washers are probably the only viable option four decades on.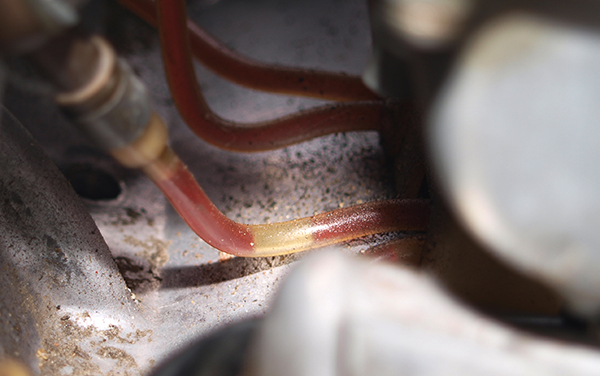
Air bubbles in an oil line are never good news. If it’s not the sealing washers under the banjo unions then it’s unlikely to be a straightforward fix. Whatever the cause rectification is vital.
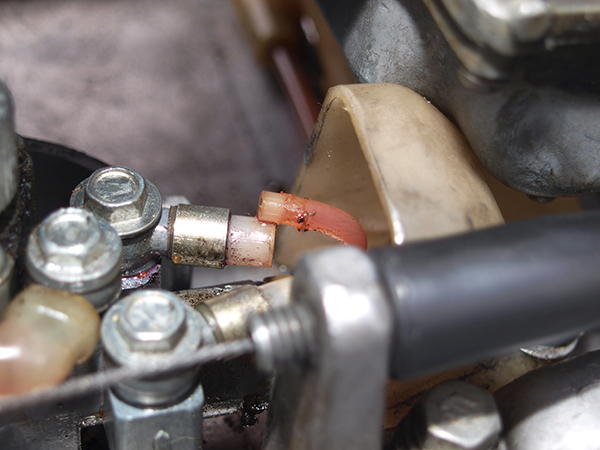
A gentle wiggle of the pipe the other end and this is what happens. The main pipe was a heat formed swaging when new but the joint has failed over time with heat, stress and vibration allowing air into the pipe. 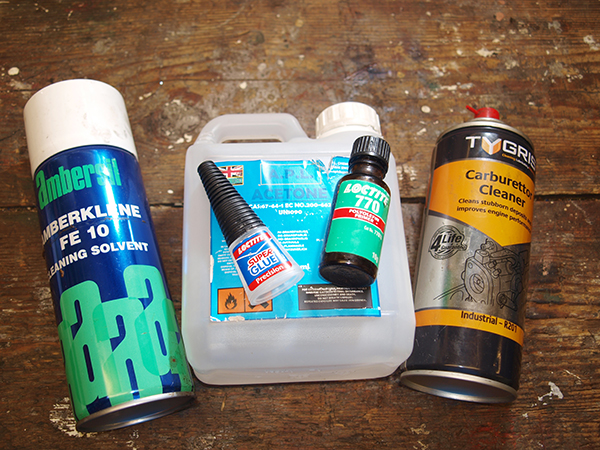
The plastic pipes are hard to find and expensive so we’re going to repair them using a bit of lateral thought and same clever chemistry. The pipe needs to be degreased, primed and glued using these materials. 
And there we have a perfectly working viable long term repair that’s cost less than sourcing an NOS replacement. One year on our adhesive repair is still functioning as intended. 
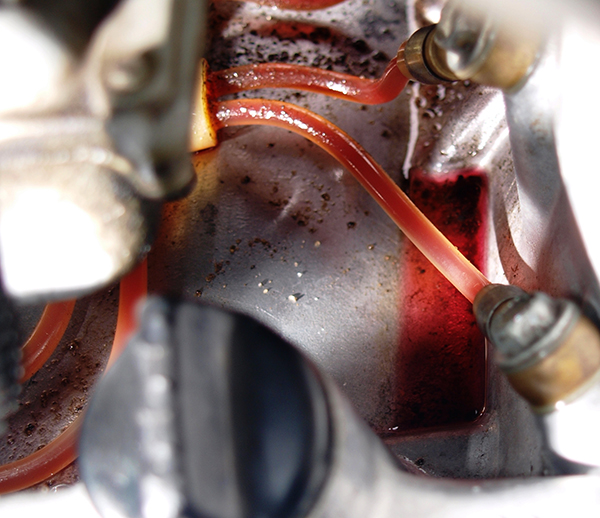
On a Yamaha this is would be a simple pipe secured on a spigot by a clip. On a Suzuki there’s a total of five jointing faces with seals and gaskets plus a non-return valve. The black crud indicates at least one of them is leaking. 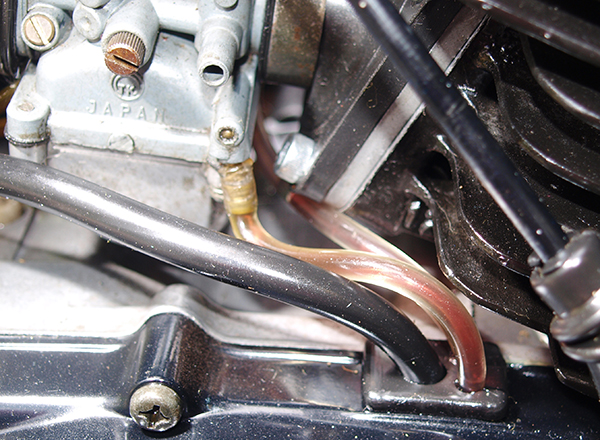
If your bike runs black oil lines and you think there may be an issue install clear tubing to check for aeration. This dodge should work for any stroker if you’re able to fit oil feed unions and banjo bolts of the correct dimensions.
Gluing rigid oil pipes
The preformed oil pipes found on numerous older Japanese strokers are made from rigid plastics such as polypropylene or polyethylene. They are referred to as low surface energy materials and generally don’t take kindly to being glued. Before broken joints such as we’ve seen in the article can be repaired they need to be totally free of grease and oil. Careful cleaning using a lint free cloth with carb cleaner or similar followed acetone should do the job perfectly.
If your oil pipe or union feels sticky after cleaning then the cleaning solvents have permeated the plastic. Allow the solvent to fully evaporate then carry on. Before the two parts can be reunited both need to be suitably primed; in not the adhesive bond will fail pretty much straight away. Those fussy plastics come under the heading of polyolefins and are similar to your household washing up bowl i.e. slightly oily to the touch.
Both the internal collar of the fitting and the external neck of the pipe should be carefully coated with a polyolefin primer/activator such as Three Bond 1796, Loctite 770, 3M AC11 Scotch-Weld or similar. Apply and allow to dry as per the manufacturers specific instructions. Now apply a thin coat of low viscosity, non-gelled, super glue to the outside of the oil supply pipe ONLY and carefully fit it into the primed socket.
You only get one shot of this and in order to get the correct orientation it’s best to have the socket end loosely in place the pump end via its banjo bolt and the keep the supply end loose at the crankcase, carb or barrel. If there’s any doubt about fitment, ease of access or alignment try a dry run beforehand; once superglue has bonded there’s no getting the components apart. Allow the glue to properly cure overnight and then prime the oil. You should find it oil and air tight ready for use.
Flexible lines
The oil lines used on later strokers are normally flexible opaque tubing secured either end with some form of metal clip. Although the metal clips don’t physically seal the pipe to the oil tank, pump, banjo bolt etc. they do perform a vital role despite their diminutive appearance. Look carefully and the pipe will be pushed over a larger diameter collar integral with the fitting.
This collar stretches the pipe as it’s pushed over and forms the seal. The pipe’s natural elasticity grasps the pipe above and below the collar thereby effecting an oil tight. The metal clip, either contracting wire or roll spring, sits above the collar and prevent the pipe being accidentally wrenched from the fitting. Road debris, vibration or rough maintenance can all subtly and gradually work an oil pipe off its fitting. Those apparently primitive clips perform a vital job; omit them at your peril!
For more technical advice, visit Motorcycle Workshop Guides: The Complete List.
To find out more about a classic bike policy from Footman James and to get to an instant quote online, visit our Classic Bike Insurance page.
The information contained in this blog post is based on sources that we believe are reliable and should be understood as general information only. It is not intended to be taken as advice with respect to any specific or individual situation and cannot be relied upon as such.

COMMENT