Workshop Guide: Ignition Sanity Check
By Steve Cooper, VJMC Editor
Many of the bikes that feature in CMM still run with the proven points and coil ignition system. Aftermarket electronic ignitions certainly have their place and with many newer examples embracing the latest microchip technologies you’d be daft not to use them on classics that are ridden regularly, far and hard. But what about those restos that may only see occasional use? Do they warrant an aftermarket kit? And even if they do is such a setup commercially available? If the answers to the last two questions were no and no, then you need to be on your game fettling what you have and not wondering why no one makes a kit for your bike. All of which brings us back to Project Stinger in a roundabout way; no one makes an electronic kit for them, so I need to optimize what I have. What follows is a comprehensive but by no means exhaustive overview of the foibles of points-based ignition and what to look out for. Yes, the Stinger is typical of many engine layouts. Agreed, it runs rotor and stator arse about-face compared to some and the way the low-tension side is set up is a little quirky, but the basic ground rules still apply. Worth reinforcing here is that these ignition systems also run one or more condensers and when they fail they can present some very odd running faults that can be hard to trace. If the bike’s ignition system is a total unknown then it makes sense to renew as much as we can and start with a clean sheet.
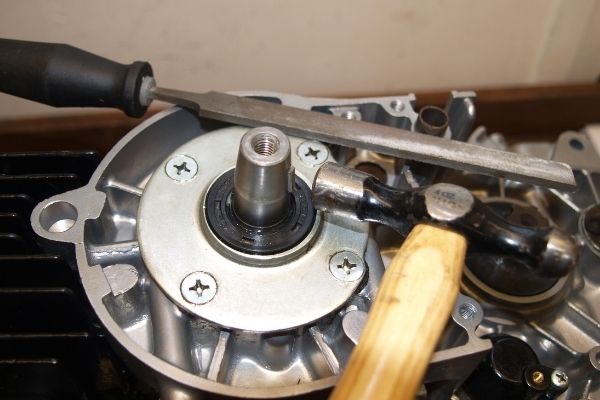
A half-moon key accurately locates vital rotating masses. If it has a few burrs it can be filed back to fit but if it’s badly worn it’ll need replacing. A gentle tap should be all that’s needed to locate it.

The rotor should be an easy snug fit onto the crank end with no slop between it and either the key or the taper. If there’s movement timing may be difficult to set and vibration is inevitable.
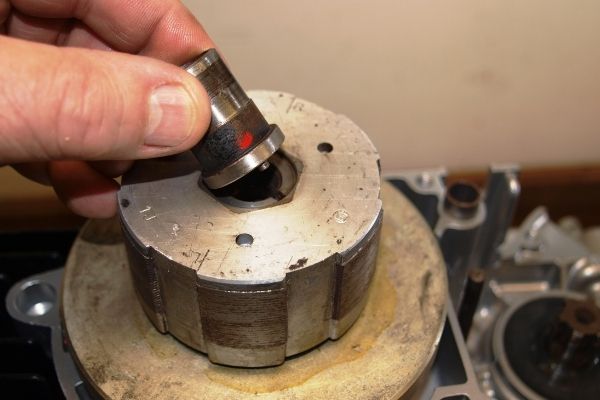
On the Stinger, the points cam sits in a recess on the end of the rotor. Note the locating peg which needs to fit snugly into the slot in the rotor.
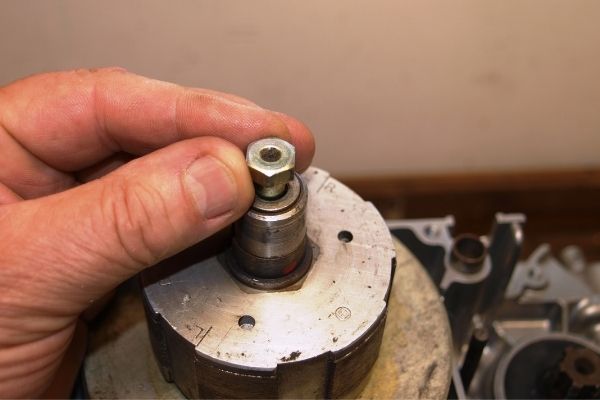
The correct bolt and washer is fitted and tightened. The bolt is often a special fitting in terms of length and smooth shank. The washer(s) may be split or dished. Both washers and bolt need to be the correct items.

Points cams can be subject to extreme wear, especially if it’s never seen lubrication. Given that spares are often hard to find or worse than the ones you have, this one will have to do for now.
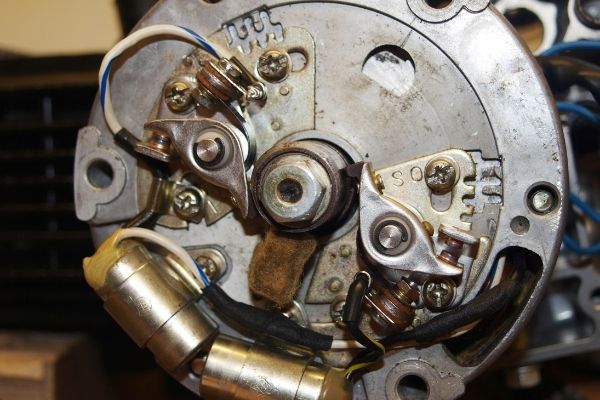
It’s almost a given that rough project bikes will come with knackered points. Here, I’m checking that the replacement sets are physically the same as the originals. Worth remembering that points are often handed left and right.
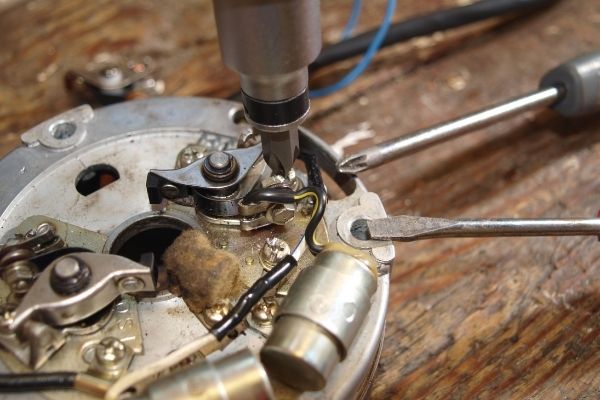
The fixing screws are a Phillips/slot head combo. Use the correct/appropriate driver. Be prepared to call in the artillery if the screw is seized in place but proceed with extreme caution.
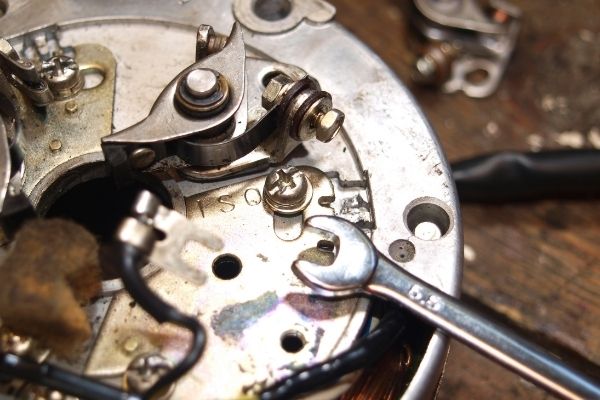
Loosen small bolts with the correct spanner, not pliers. A ¼” drive socket set and miniature spanner kit make for good working practice. Note the position of the insulating washers; don’t lose/omit them or the bike probably won’t even run.
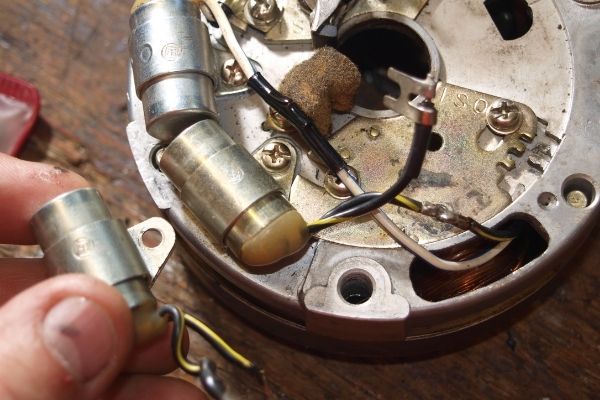
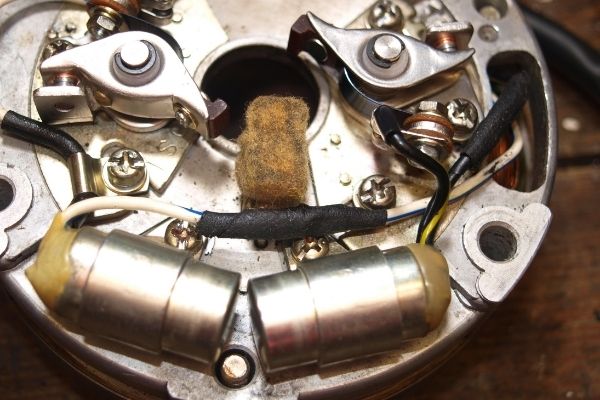
Condensers can be handed to but their function isn’t! If push comes to shove it’s possible to remove the existing bracket and fabricate one to suit. It’s the capacitive value and physical size that dictates usability.
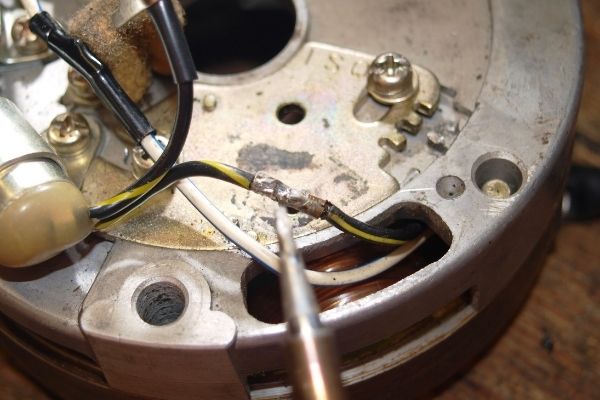
Typical of period Suzukis the condenser cable is soldered to the loom. Use a soldering iron to sweat the joint apart and reconnect using electrical solder. NEVER use plumbing flux on ignition systems; it causes rampant corrosion!
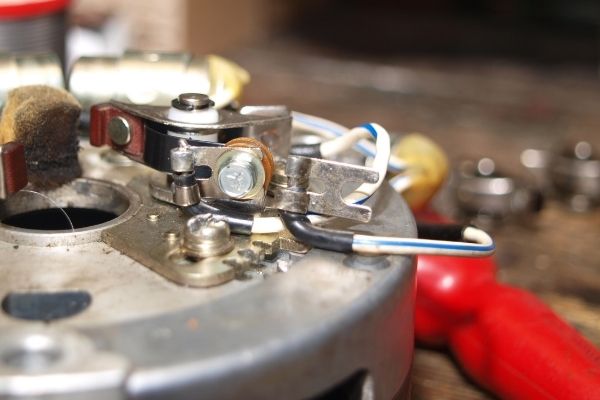
Make sure aftermarket parts have the correct colour wiring and oversleeving where appropriate. If not, make notes for next time in a manual and add a layer of insulation at key areas.
The protective sleeving to the original condenser wires was partially chafed. An extra layer of cloth loom tape over the new heat shrink should add additional protection.
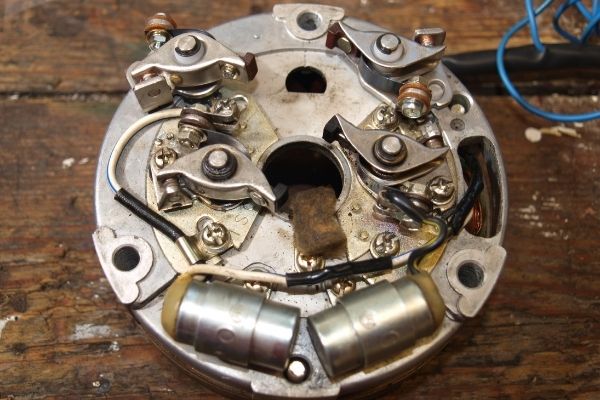
Stator back in place to retain the rotor’s magnetism. All that’s left is to install the former in the outer engine cover and time the engine.
So there’s a snapshot of what makes up a period crank-mounted ignition system. If you have a four-stroke with points running off the cam the same logic and modus operandi still apply; it’s just that the location and layouts will look different. The eagle-eyed will notice I’ve not oiled the felt pad on the points cam. It’s a moot point as to whether this system actually works. The theory is that capillary action should drag oil from the pad onto the cam and prevent both it and the heel of the points from wearing. I’m yet to be convinced that light machine oil can withstand the vagaries of rapid acceleration and deceleration from zero to eight grand and back again. Until then, I shall be adding a very gentle smear of grease and removing the felt pad.
For more technical advice, visit Motorcycle Workshop Guides: The Complete List.
To find out more about a classic bike policy from Footman James and to get an instant quote online, visit our Classic Bike Insurance page.
The information contained in this blog post is based on sources that we believe are reliable and should be understood as general information only. It is not intended to be taken as advice with respect to any specific or individual situation and cannot be relied upon as such.

COMMENT