Workshop Guide to Shock absorber refurbishment
By Steve Cooper, VJMC Editor
By Steve Cooper, VJMC Editor
Presented with a set of manky corroding OEM shocks, most right-thinking, practical, owners would be thumbing through CMM’s small ads to find viable replacements. And to be honest it isn’t exactly hard to find something that’ll do the job. Chances are pretty much anything that’s on offer will be as good or better than many of the 60s and 70s rear suspension units in terms of actual compression and damping. Many period units were little more than oil-filled pogo sticks with a seal, rudimentary valving (if you were lucky) and flash of decorative chrome.
OK, so I’m not painting an especially rosy picture here but you get the idea. However, the flip side is that many of us are irrationally biased towards maintaining originality if we reasonably can. If it’s possible to resurrect old Japanese shocks why not go for the best of both worlds, if the bike’s a keeper? A set of aftermarket units for riding and perhaps a revitalised pair as and when the bike makes a show or event appearance? Period Japanese shocks are easily swapped over and if you can’t manage the four nuts necessary to change the units, it’s debatable whether you should be allowed the keys to the bike!
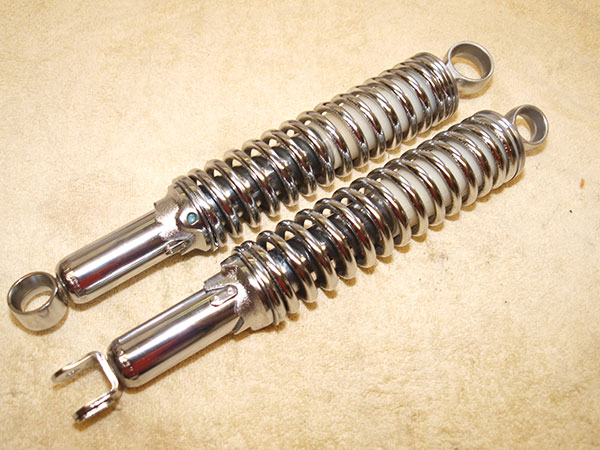
Get the bike on the bench
On the bench this month are a pair of typical late 60s/early 70s rear units that have suffered the ravages of time and poor storage. Visually they’d let any bike down. Can they be taken apart? What’s involved? Will I end up with springs and God knows what else flying around the workshop? Well, we’ll find out then, shall we? One thing that needs to be stressed is that we’re looking at a cosmetic refresh here and emphatically not an internal rebuild.
Each set of shock absorbers comes with a set of inbuilt limits, and their construction clearly dictates what is and isn’t viable within the context of the home workshop. One important but easily overlooked maxim when working on shock absorbers; is always work with the pre-load collar on the softest setting, it makes life so much easier.
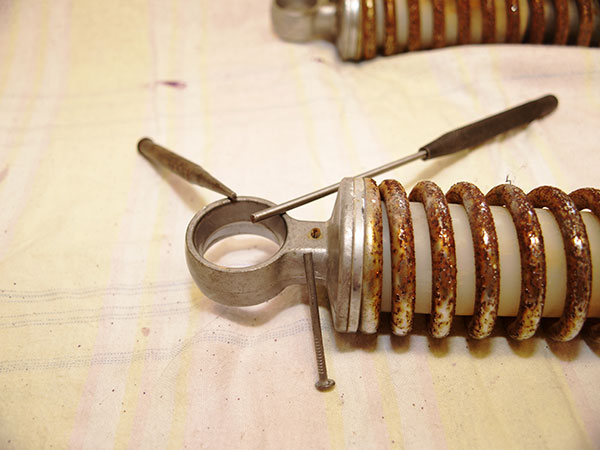
The top of the shock rod is often secured by a rolling pin, which needs to be released. They’re often corroded in place and require easing oil, heat and precision percussive attrition. Flat punches, small drifts or even a cut-down nail may all serve a useful purpose here.
Tapping, heating and ACF-50 have all contributed to the freeing of this rolling pin. If new ones can be sourced great; if not remove them carefully and reuse them once cleaned and greased.
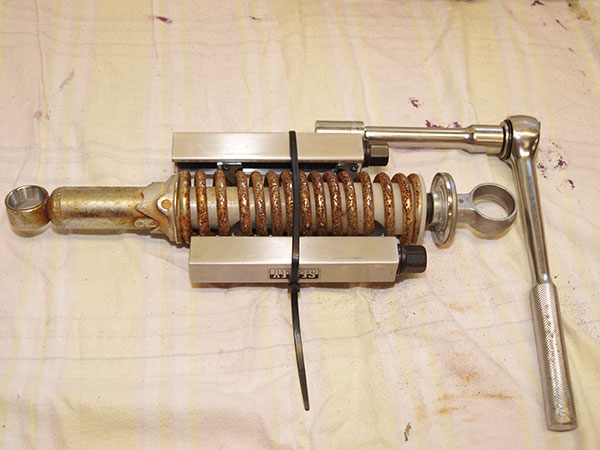
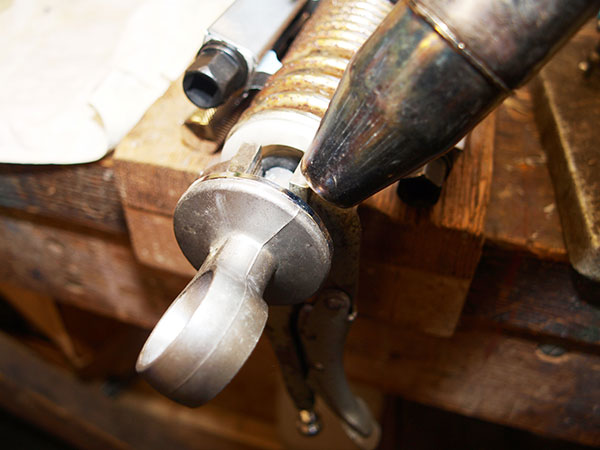
Using a set of spring compressors, the coils are compressed to allow access to the top internal retaining nut. A thick cable tie ensures the compressor cannot be inadvertently dislodged. You really don’t want your fingers caught in here!
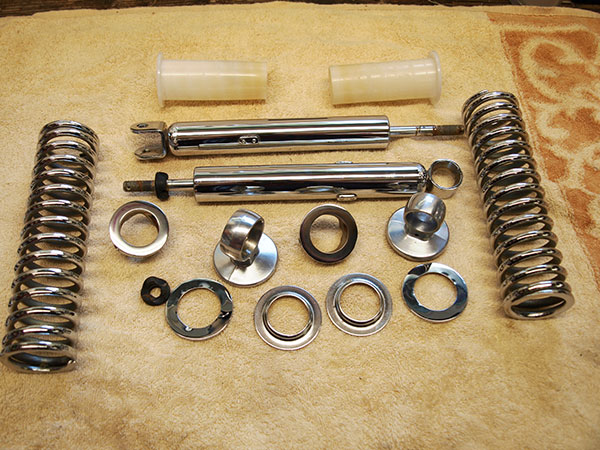
From left to right: coil spring, internal plastic shroud, damper rod, rubber bump stop, retaining nut, chrome trim, alloy shock top. The nut now needs to be backed off from the alloy casting.
The alloy casting will have bonded to the damper rod over time. Thermal shock should break the bond. A cycle of a hot air gun and a bucket of cold water work wonders.

Open-ended spanner on the retaining nut, stout bar through the top eye and... heave. The two are normally damn tight so expect to use some muscle here but don’t dislodge the spring compressor or it may get painful.
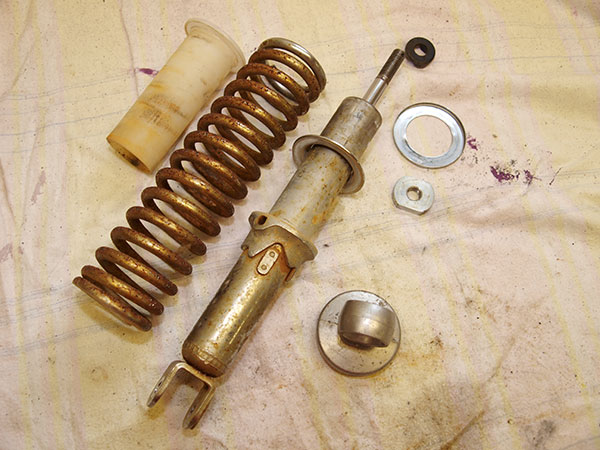
And there it is, apart. Note, document and photograph the order and orientation of each and every component. Some are off to the platers and it may be months before it’s all back together again.
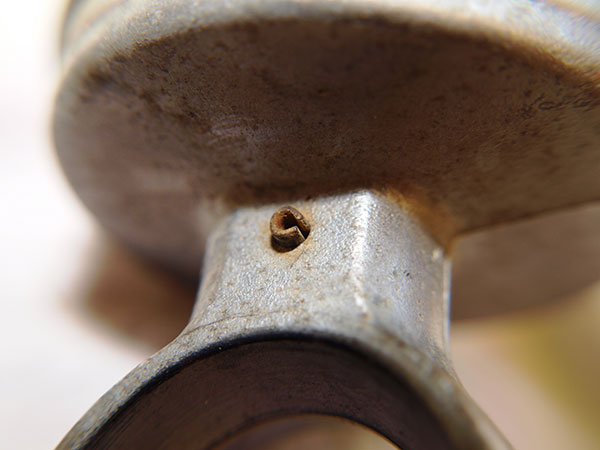
Clean out the roll pin’s locating hole now before you forget. It’s often full of corrosion which will make reassembly difficult.
You should never need to grip the damper rod to disassemble a shocker. If you do and this happens, you are possibly looking at a scrapped unit.
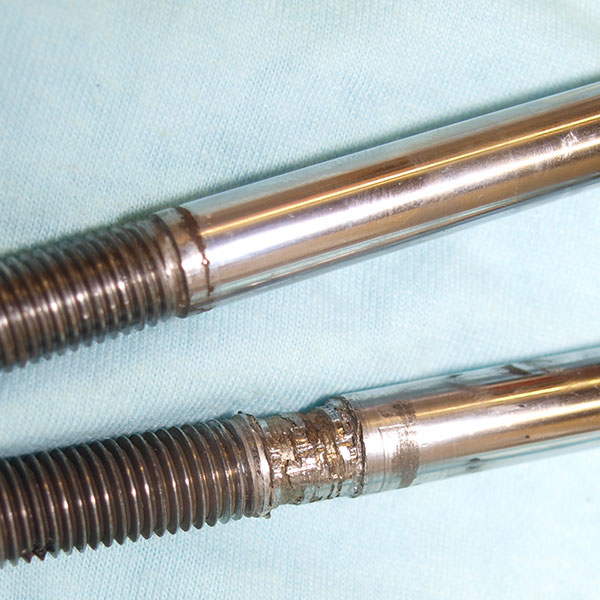
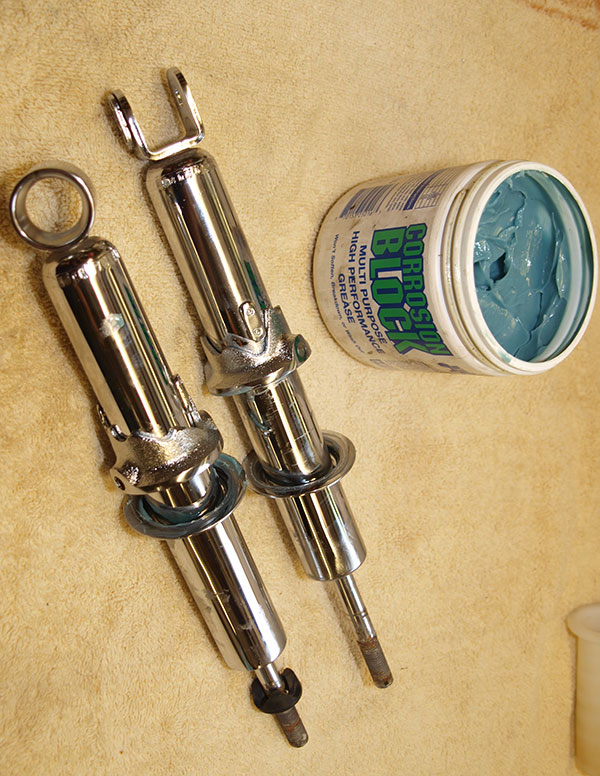
The chrome’s away so I’ve cleaned and buffed up the two. Allow tops leaving just enough striations in the alloy so they don’t look overdone. A few coats of self-etching lacquer will preserve them and look like the OEM finish.
As Paul Daniels used to say...”Now that’s magic!” An amazing transformation and hardly a corrosion pit in sight. The white plastic shrouds came up well in the dishwasher but don’t tell the missus, please.
Adjuster ring and chrome trim fitted back in place with some anti-corrosion grease. This will make assembly easier and hopefully stop any subsequent rusting.

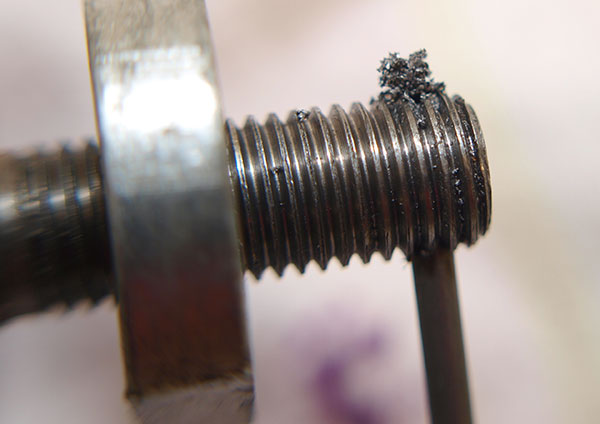
A tap and die run over and through the threads removes any corrosion and ensures everything winds down properly. Make sure the blind hole in the casting is totally free of crud.
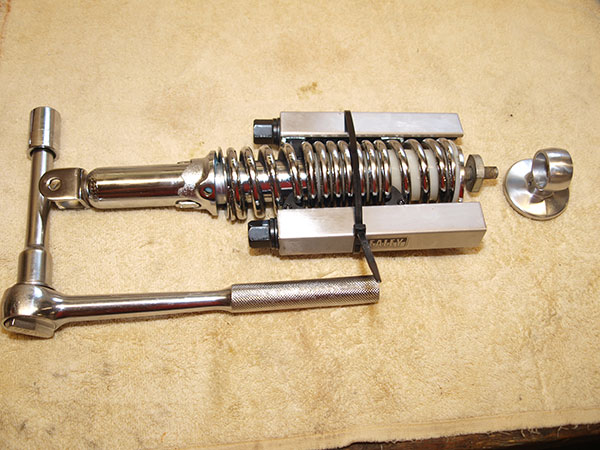
Back on with the compressors and the cable tie. Note I’m working on an old towel to minimise damage to the fresh chrome.
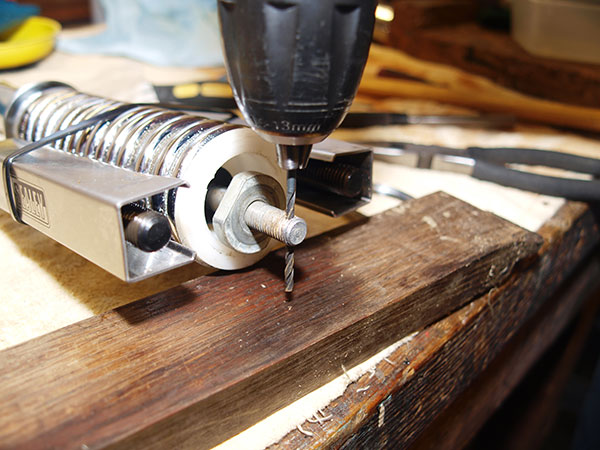
The original roll pins were too corroded so I’ve bought new ones. They’re fine in the alloy tops but too tight on the damper rod. A gentle relieving ream out with a twist drill sorts it out.
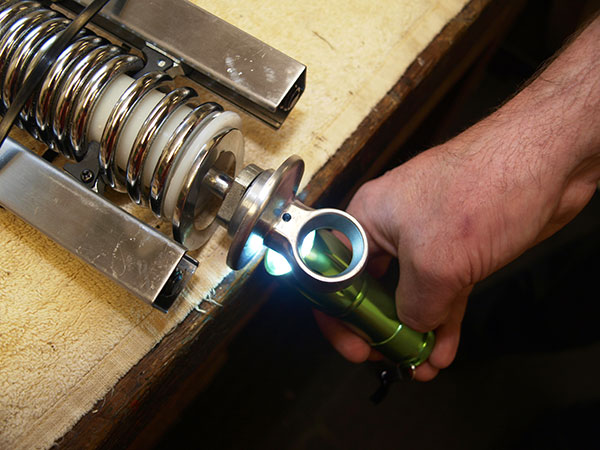
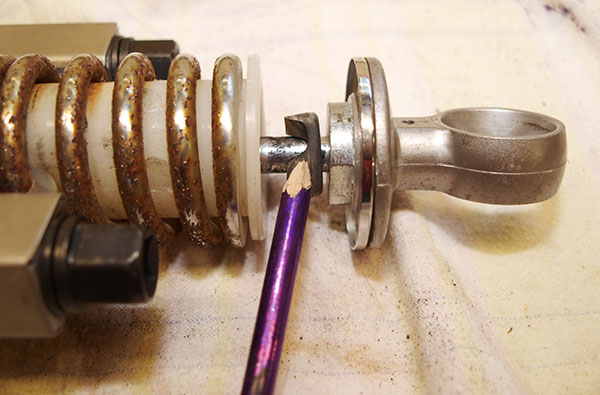
An LED torch allows me to align the roll pin holes. The alloy top is normally quite tight on the damper rod, so protect the latter with thick tape if you need to grip it to prevent it from turning in the shock body.
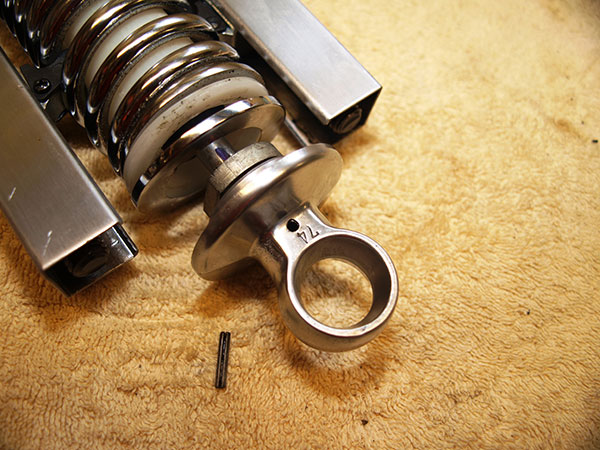
Rod and alloy casting aligned; roll pin and holes lubricated. The retaining nut has remains backed off as far as possible at this stage.
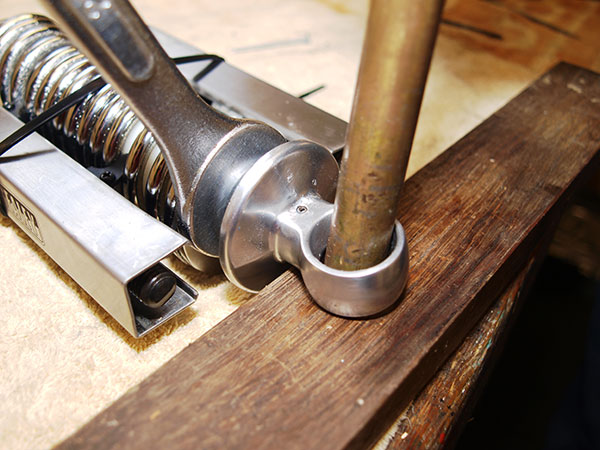
The roll pin has been tapped back in place, and the retaining nut wound up to the base of the alloy casting. A reasonable tweak of shock eye and nut sees the job almost finished.
And there they are; a pair of period Japanese shock absorbers renovated and rebuilt. Even taking into account the cost of the spring compressors, the plating and sundries I’ve still saved a fortune on a pair of NOS units.
For more technical advice, visit Motorcycle Workshop Guides: The Complete List.
To find out more about a classic bike policy from Footman James and to get an instant quote online, visit our Classic Bike Insurance page.
The information contained in this blog post is based on sources that we believe are reliable and should be understood as general information only. It is not intended to be taken as advice with respect to any specific or individual situation and cannot be relied upon as such.

COMMENT