Workshop Guide to the Art of Body Solder
By Steve Cooper, VJMC Editor
Before the advent of modern, two-part curing, body fillers that damaged thin gauge sheet metal work on bikes and cars were repaired by panel beating and puddling. The former is a higher art form that requires very significant skills, training, experience, and a fair capital outlay; the latter is a skill that can be relatively easily acquired and lends itself to many restoration tasks we commonly encounter.
Welding or heating can recreate and repair damaged panel work, but the final profiles will almost certainly need further work. The various epoxy-based body fillers available fulfil an amazing number of roles but they do have limitations; they are prone to moisture absorbance, sometimes lose adhesion, and occasionally shrink.
The use of body solder, metal wiping, lead puddling, or metal loading overcomes all of these issues. The filler is locked into the base steel at a molecular level via a mechanism the boffins call an intermetallic layer, but enough science. Throughout this article, I’ll be looking at the basic techniques necessary to grasp this very useful skill and some of the tricks of the trade that make it easier.
A quick word about working practices here. I am applying heat to a fuel tank but this has been cleaned before the welding fabrication so I have no concerns about fire. Ensure any items you may work on are similarly safeguarded; work with ventilation and use hand, dust, and eye protection where appropriate.
The metal filler used is solder; a blend of tin and lead that is intrinsically safe in our process but should be treated with care for obvious reasons. To put this into perspective, the now common epoxy-based body fillers are known sensitizers, causing all manner of issues yet we treat them with impunity. Many never use gloves with this system despite the recommendation, let alone dust masks when sanding. So here goes; a mature tank being refurbished by an old codger using ancient technology...a perfect recipe for CMM.
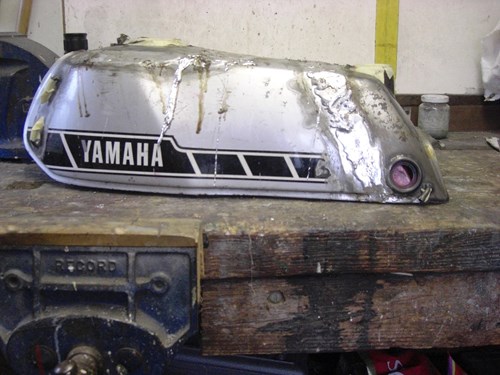
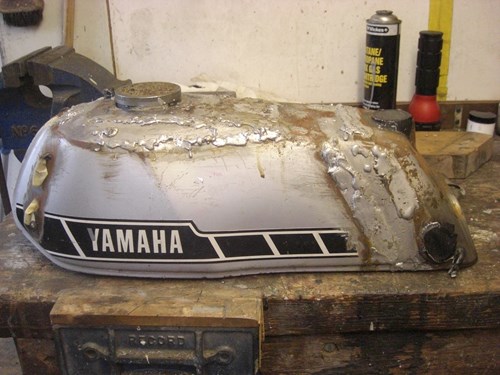
Bare Tank
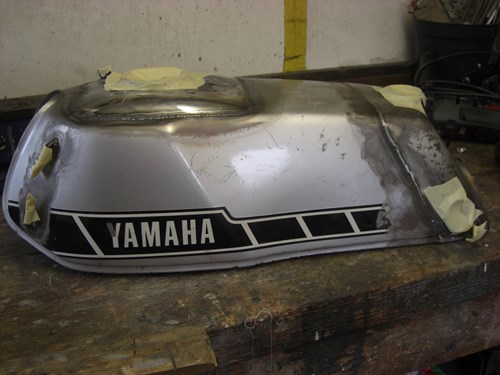
Here’s the bare tank. The back end of one tank has been grafted to the body of another to provide an oil tank. The original filler cap has been removed and the section inserted to provide a different filler cap neck. The work has been carried out by a real wizard utilising a very high degree of skill with some cunningly crafted seams, plus some artful panel beating, and all expertly assembled using TIG welding. To achieve the desired look some form of filler is required and I’ve opted for body solder. Some might question the use of metal loading on the grounds of weight; however, the actual mass is relatively low. I’m confident I could make a more significant impact on the vehicle’s final weight by eating fewer pies.
Paint Removal

Whether you choose to use body filler or body solder, the steel requiring covering needs to be clean and free from paint, dirt, rust, and grease. The tank has been thoroughly cleaned to ensure there’s nothing on the remaining paint that will affect the subsequent work or get transferred to the paint removing the wheel. Rather than use a paint stripper, I’m using a purpose-made abrasive paint removing wheel on a drill. These are available from a car spares shop or eBay for little money and once used you’ll wonder how you ever got by without them. The abrasive removes old paint and decals along with rust to give a clean satin steel surface. I’m leaving the paint in a place where I don’t need to puddle to prevent any unnecessary rusting.
Seams Close Up
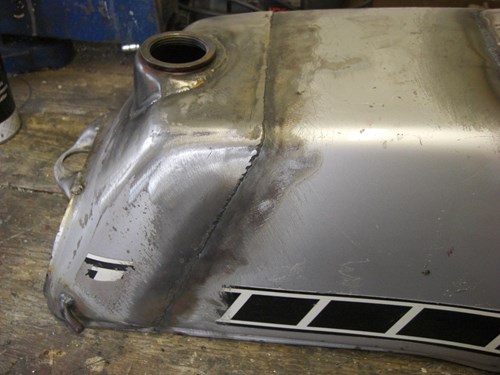
A closer look at the tanks shows the various seams that need to be filled or covered. The side seams don’t need a great depth of filling but are quite wide when a straight edge is laid across them. The tank top presents a different challenge as I am aiming to create a smooth profile rather than keep the current camel’s hump look. It’s in this second area where body solder wins hands down over modern body fillers. Large or deep areas of body filler can shrink, crack or lose adhesion; the body solder simply stays put just like the soldered joints in your home’s plumbing system.
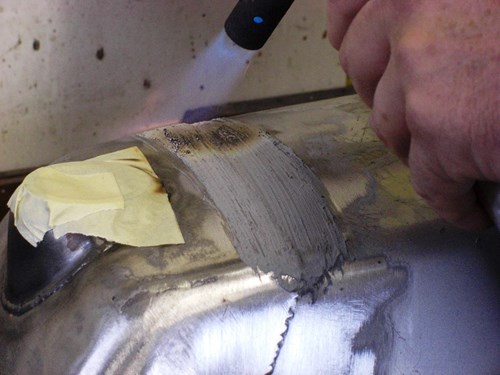
Solder

Here I’ve applied a thin but continuous coating of solder paint to a seam. This contains a powerful flux and powdered solder. The flux chemically cleans the steel and prevents oxidation whilst the solder melts under heat and metallurgically bonds to the steel. When applying solder paint, always use a cheap natural hairbrush, not one with synthetic bristles. As you develop your technique and abilities you’ll find occasions where there’s a need to apply more solder paint to a hot metal surface. Natural bristles are fairly resistant to heat; synthetic bristles have a nasty tendency to melt, compromising the flux and solder’s ability to bond to the steel.
Tinning
Now we’re getting into the real action. I’m heating the solder paint with an ordinary gas torch, working gradually from one side of the joint to the other. The torch is played from side to side over larger areas to ensure uniform and comprehensive heating. If the solder paint spits excessively, you’ve applied too much or the flame is too intense. The paint will start to darken as the solder melts, turning silver. I remove the flame and wipe the joint with a pad of cotton cloth. This removes the excess solder/flux and also helps promote better tinning. Don’t use synthetic cloths as these will melt.
Applying the Solder
Finally, I’m applying the body solder to the previously tinned areas, it’s not an elegant process but, now I can see some real results. Warm the tinned steel at the same time as heating the solder so that molten blobs fall onto the panel. Transfer the heat to the solder on the tinned steel until it begins to flow and bond to the tinning where you’ll see the edges of the blob flow. As a novice, it’s easier to keep the panel horizontal as it will be much easier to control what you are doing. Aim to add sufficient material such that the solder you’ve melted is above the surface of the joint or area to be filled. Keep adding solder until the correct level has been achieved.
Soldered Seam
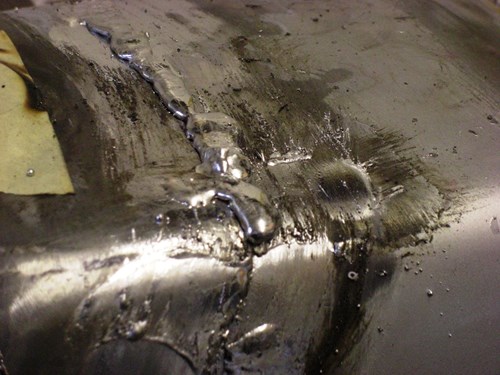
Up close, we can see how the solder has filled in one of the side seams of the tank. The main aim is to ensure any dip or depression has been filled with the body solder and generally this has been achieved. Normally with a bit of practice, you’d expect to go directly from applying the solder to puddling and the resultant application would have a lower profile. However, if you’ve got something looking like this you are definitely on the right track. There’s no point in trying to run before you can walk.
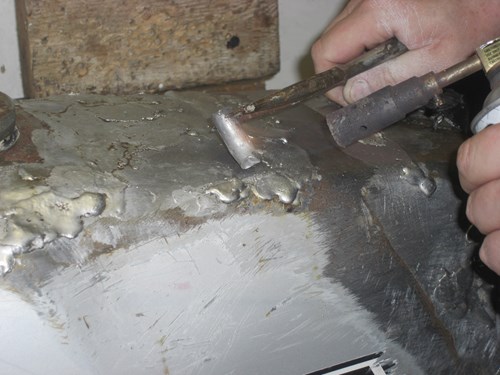
Puddling
The solder I’m using is a blend of either 30% tin and 70% lead or 20% tin and 80% lead. These types have a large plastic range which means the solder begins to melt at one temperature (1830C) and is finally liquid at a much higher temperature (2770C). With a plastic range of nearly 1000C, I can heat the solder and move it around with a beechwood paddle that’s been wiped in tallow. The tallow allows the paddle to move the semi-molten solder around like warm putty. By balancing the amount of heat, I can control just how liquid or pasty the body solder is. With a bit of practice, it’s surprising how easy it is to influence the profile and the level of metal filling.
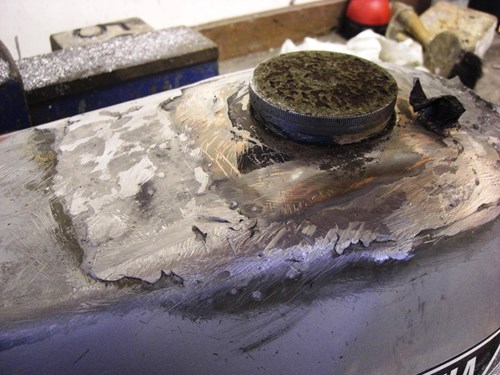
Post Solder Application
After the first run, the tank now has a liberal coating of body solder in all the appropriate areas. There’s a fair amount of overspill but this can be simply lifted away. The flux in the solder paint will cause quite dramatic rust unless washed off with water. Clean wet rags do the job well but throw them away after use. Excess tallow won’t cause a problem like the flux but can be wiped off when warm or washed away with a bike degreaser or similar when cold.
File
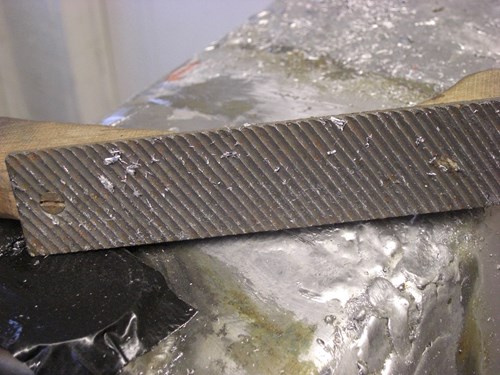
Now I need to remove excess body solder by starting to profile the various areas to see where I still have to apply more metal loading. So far pretty much all the equipment used will be readily available or can be adapted. The file is the one item you will almost certainly have to buy. It has very coarse curved teeth (8 to 10 tpi) that are undercut and will not immediately clog with the soft body solder. These files are sometimes found out auto jumbles or boot sales; otherwise figure on paying £15-£30 depending on specification. Don’t be tempted to use a “Surform” type file or a toothed rasp with body solder as these will leave deep grooves as scars in the panel.
Roughing Out
At last, I can make a real effort on giving the tank the profile I want. Gentle forward pressure drives the file over the high points and takes off a surprisingly large amount of the body solder quite quickly. It’s useful to listen to the sounds given off as you file; the note changes dramatically as the file touches steel. I continue filing until I have a profile I’m happy with. The coarse teeth of the file won’t damage the steel too much and have little impact on it unless hard force is used. If the file does clog, the body solder can be removed with a gentle rub across the blade with a piece of flattened copper pipe.
After First Dressing
Now I can see just how good or bad my initial applications of body solder and the subsequent filing have been. Generally speaking, the results are encouraging and I can see where the low spots are that will need further filling. This is just the same process whether you’re using body solder or epoxy-based body filler; it’d be a cold day in hell when the average enthusiast got all the low points filled the first time. It’s worth remembering that I’m not trying to achieve total perfection here, any minor imperfections can be attended to at the painting and preparation stages later on.
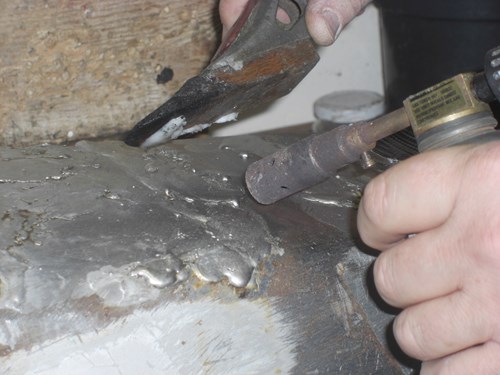
Second Solder
With the bulk of the filling done back at step 6, I’m now adding more body solder to the pits and hollows revealed during step 11. If there’s bare steel that needs tinning, I’m adding some more solder paint and tinning where necessary. For areas of body solder that are reluctant to accept more solder, I can apply a few drops of a commercial flux known as Baker’s Fluid; this is effectively the flux used in the solder paint. The dark brown rust has been caused by the flux. Reprising the steps 6 to 12, I’m now ready to fettle the tank and body solder at the next level.
Sanding
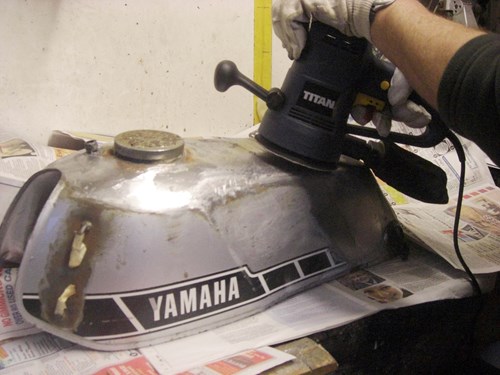
In “the good old days,” the next step would have been done with various grades of hand files rubbed with chalk to stop solder build-up, then followed by further laborious hand filing with emery cloth wrapped around a file. For the princely sum of £24, I’ve invested in a rotary dual action, random sander, and some 80 grit discs. The results are almost instantaneous and I cannot believe how quickly I’ve got through this normally long-winded process. To keep the dust down to a minimum, I’ve placed the tank on dampened newspaper. Any pits or hollows apparent now can be metal-filled as before and the job is pretty much done.
The Final Result
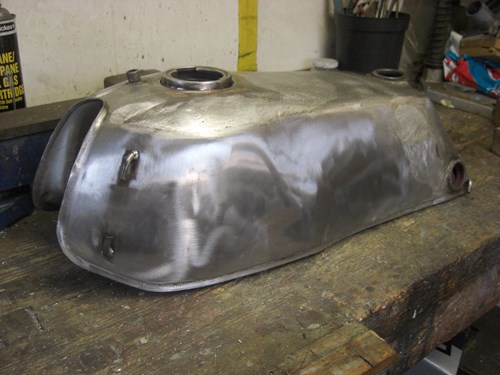
The remaining paint has been removed, along with the majority of the surface rust. I can now get a much better idea of what the tank will ultimately look like. The small surface imperfections can be attended to with a heavyweight soldering iron and a few dobs of body solder along with some Bakers’ fluid or some filler/stopping. A couple of coats of high build filler/primer should see the tank well on the way to completion. All I have to do now is decide on which of the half dozen paint schemes I have running through my mind.
Conclusion
Although the most obvious route would have been to profile the tank with body filler, I’m more than happy with the outcome achieved by puddling. The amount of filing and sanding with either method is about the same, but I’m confident that there will be no cracking or shrinkage on this tank. Another skill has been acquired and the satisfaction/achievement factor in doing this is a real confidence booster.
For small dents or knocks, less than the size of a 50p piece and moderately shallow modern body fillers still make sense but for my future classic projects, I’ll be reprising the techniques mastered here whenever significant panel fettling or repair is required. As a final note, I’ve weighed the tank before and after and the increase in weight is less than one and a half kilos. That’s a fairly modest penalty for a job that will last indefinitely.
For more technical advice, visit Motorcycle Workshop Guides: The Complete List.
To find out more about a classic bike policy from Footman James and to get an instant quote online, visit our Classic Bike Insurance page.
The information contained in this blog post is based on sources that we believe are reliable and should be understood as general information only. It is not intended to be taken as advice with respect to any specific or individual situation and cannot be relied upon as such.
I remember watching this process being carried out on the production line of the Hillman Avenger. There was a joint on the "C" post to which it was applied.
Charlie, 14/10/2023
Thank you. Have tried this method over the years. Now I know where went wrong.
HH, 29/01/2022

Great article- I’m currently restoring a Hillman imp 1965 - I would love to find someone local to me to carry out lead loading on the body repairs I’ve had done - having watched what you’ve done with the tank I’m tempted to have a little try myself (what’s the worst that could happen ?) Thanks for posting the article ??
Rowley , 29/01/2022