Workshop Guide to Making Fibreglass Panels
By Steve Cooper, VJMC Editor
In the course of restoration projects we generally find the parts we need. Sometimes missing parts turn up as perfect NOS, occasionally it’s shop soiled, but quite often we just have to settle for a damaged or rough second-hand part. When you can't find that missing part you may just have to fabricate a facsimile. It’s not too difficult if we are talking a wheel spacer, but how do you overcome missing tinware? Commissioning someone to replicate a side panel or a headlamp shell will be both time consuming and possibly prohibitively expensive. Today we look at the true enthusiast’s solution to the problem; home fabrication in fibreglass or GRP. If you can borrow an identical panel you can make a mould; it’s really straightforward. Even a very badly corroded panel can generally be strengthened to a point where it can be used to create copy sufficient for our purposes. Years ago I acquired a 1962 Yamaha step-through for two pints of beer and a promise to let the seller see the finished article. Most of the missing parts have been obtained but unfortunately the absent left hand side panel had proved to be impossible to locate, so the entire project ground to a halt.
A friendly dealer very kindly loaned me an identical panel so I had no excuse not to get going on the project. Having wrapped the panel in cling film for protection, it was pressed into a box filled with Plaster of Paris or modelling clay until the material set. After allowing the mould to fully dry, any serious imperfections were filled and sanded back. It’s worth remembering that the finished panel is going to need some fettling anyway so striving for a perfect mould is fairly pointless; it’s far better to spend the time working on the finished article than the mould. I know my limitations and it takes years to be a professional pattern maker.
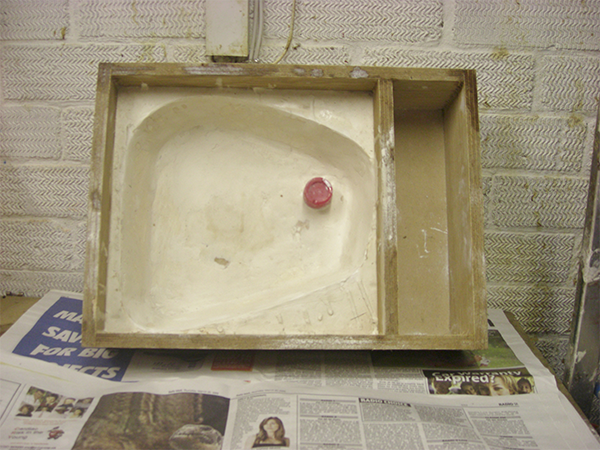
The basic mould’s been sanded, filled and given a coat of 50/50 PVA glue and water to help seal it. The red lump in the centre is the site of the panel’s mounting point; I’ve used the top from a can of WD-40 as a dummy for this hole.
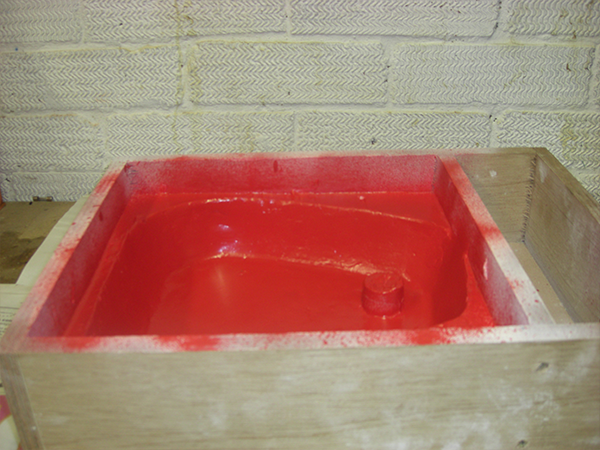
Two coats of any convenient aerosol gloss helps further seal the mould and assist in releasing the finished panel. I’ve also managed to blag some mould release compound, sprayed this and allowed it to cure. Alternatively a coat of good old fashioned traditional hard wax polish will suffice. The use of silicone polish should be avoided as this will have an adverse effect at the painting stage.
Before getting “stuck-in”, I double check everything needed is on hand and in sufficient quantities. I’m using resin & hardener, fibre glass tissue & mat, disposable brushes, latex gloves, disposable mixing pots and either acetone or cellulose thinners for cleaning down.
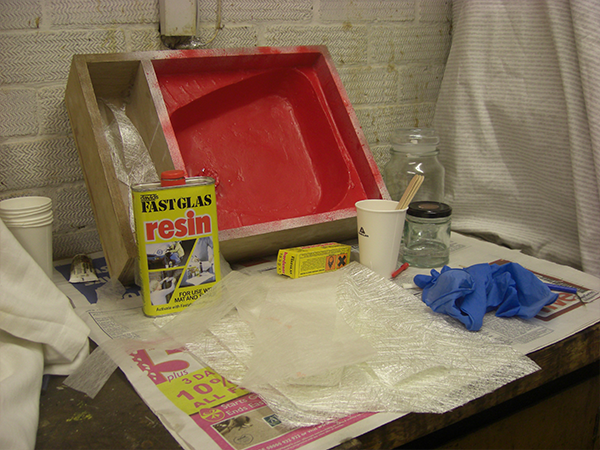
The mixing pots can be anything that will withstand the resin; clean tin cans are fine but avoid plastic vending cups. If the panel you are replicating has internal bracing, stops, mounting points, tool trays etc. then make copies from a clean steel sheet, ready to be incorporated in the various layers of fibre glass matting. Aim to add a fair sized lug around all mounting points to ensure adequate support. When professionally laying-up GRP panels, a gel coat is applied first to the mould; this high-gloss, protective outer layer often contains colour or pigments. For our purposes we can omit this step as the panel will have to be painted along with the rest of the bike. Remember to work with good ventilation and do not attempt to lay up GRP indoors or in a garage directly attached to your house; the all-pervasive odour does not enhance relationships (allegedly)! The mould is given a well-mixed coat of resin and hardener made to the manufacturer’s recommended ratios and the brush is given a quick clean ready for the next stage.
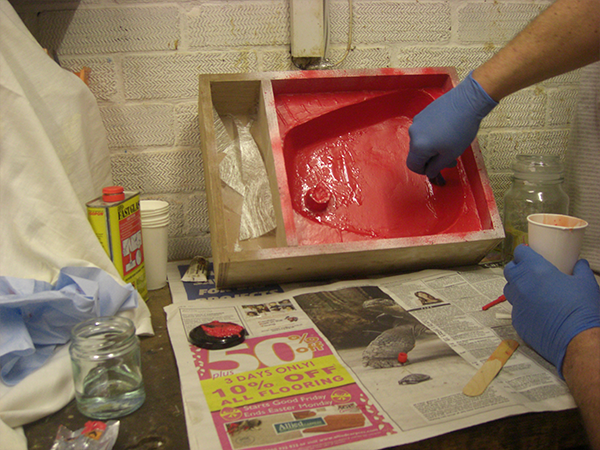
The outermost layer of glass fibre is referred to as 'tissue matting' or 'fibre'. The finer material is ideal for lightweight panels and can be bent, positioned or formed easily with little chance of fibres protruding through to the outside. To cut down on waste, make the job simpler and less messy I’ve roughly cut out the various layers/types of matt beforehand. I’m allowing a reasonable amount of overlap between each layer’s cross-overs (and the subsequent layers) so that there are no obvious repetitive seams or weak points. A thin, quick coat of resin mix is applied to the previous coating if it has overtly cured and the tissue matt stippled on with more resin mix to ensure a firm all-over bond.
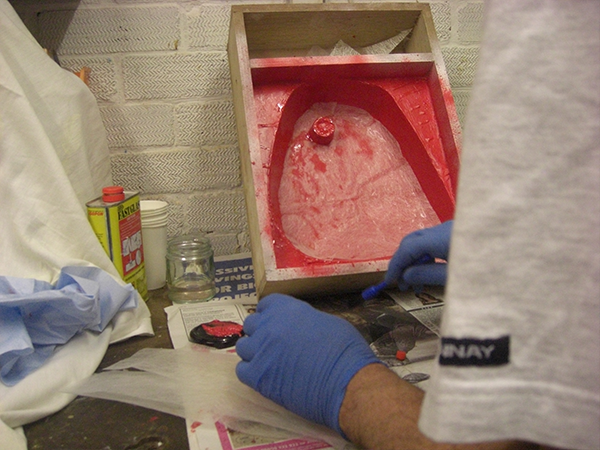
The next layer is the first of the coarser layers; referred to as chopped or strand matt.
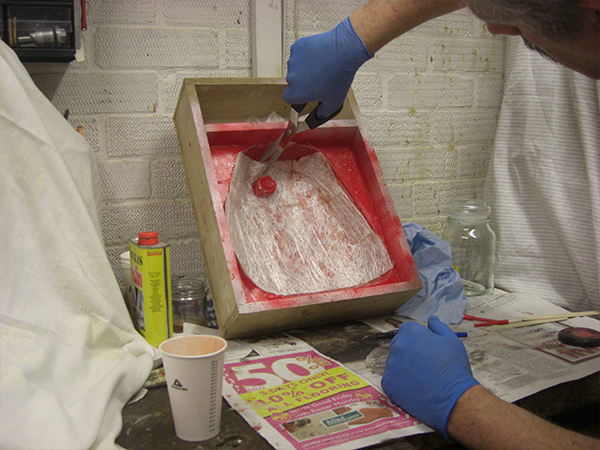
This is the material that gives the panel most of its thickness and, along with the cured resin, its strength. This material will need commensurately more resin and hardener due to its mass and absorbency; there’s no point in being mean with the resin here. Following the manufacturer’s instructions and using the right proportions, a mix of resin should have a pot life of around twenty minutes so don’t mix more than you can use in that time frame. Do not be tempted to apply the resin and hardener if it starts to become viscous or jellified; it’s starting to cure and won’t bond properly. Ambient temperature plays a major part in the curing or reaction process. Fibre glassing is one of those jobs that you can happily do in a shed (or workshop) over winter and know the lower temperature won’t give you adverse results, unlike paint spraying. However, you may have to increase the amount of hardener. Wearing gloves I’m applying the resin/hardener mix to the chopped mat I’ve laid over the still tacky tissue layer. By stippling it’s possible to ensure the fibre glass is totally impregnated thus ensuring the best layer-to-layer bonds.
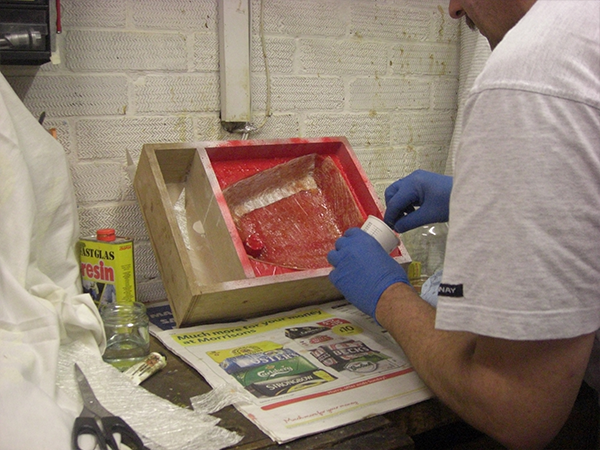
The number of layers required depends on the job and the application so consider what stresses the part is likely to see. As I have the RHS panel to study, I can know that I’m aiming at 2.5 mm thickness (which in this case roughly equates to one layer of tissue and 2 layers of chopped matt).
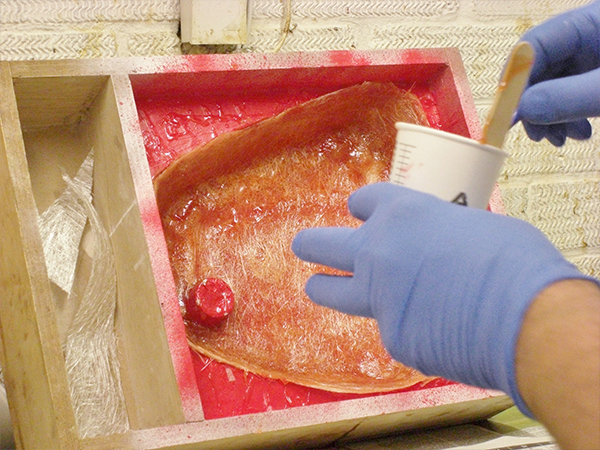
Continue adding layers until the correct thickness is achieved. If you need to add any internal bracing, stops, mounting points, tool trays etc. then try to place these in the middle of the coarser layers to ensure the best support. If appropriate, make a jig to hold the parts in the correct place. Larger holes can be produced in-situ as per this panel. Smaller holes or panel hanging slots are probably best cut later using a Dremel.
With the panel now laid up I’m leaving it undisturbed overnight, having cleaned off any tools in acetone or cellulose thinners. The following morning I’m hoping it all comes apart as it should, but despite my best efforts I'm getting nowhere fast. The panel is caught in places I can’t access so it’s time to have a 'cogitative cuppa'. The panel seems to be stuck at the base, as I can get a tiny amount of freedom at the sides and feel some movement. Although I didn’t want to damage the mould, an hour’s messing about has convinced me I’ll probably have to. Removing the end allows access to the panel with the most angles, curves and radii, so I’m hoping this is where the problem lies.
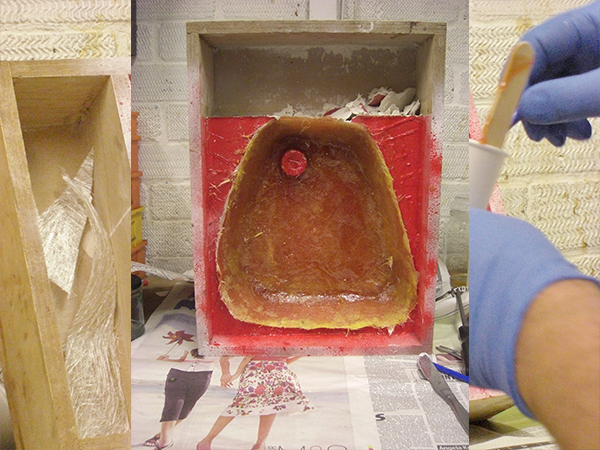
Digging away the mould and applying a few gentle taps with an old kitchen knife, then a blunt wood chisel ultimately frees the panel. Released from its plaster of Paris prison I finally have a reasonable facsimile of a 1962 Yamaha side panel.
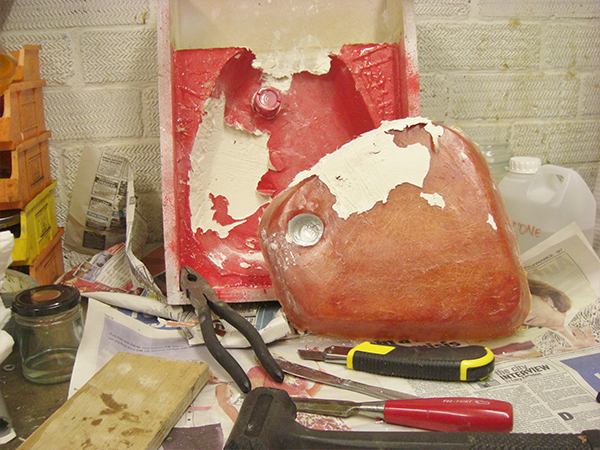
There are a few warts and pits but I was expecting that. The mould has well and truly stuck in a few places but some patience with the wood chisel (now sharpened) soon has the panel looking more like it should. It looks like the mould release agent didn’t work in a few places. Getting a perfect mould requires and lot of skill and time; I’m more than happy to fettle with fillers and carry out some sanding. Although I’m not planning on making another panel, the mould is not irreparably damaged and could be resurrected if necessary.
Now the worst is over I can carefully inspect the panel and take stock. There are lumps inside where the matt has bunched up and these may need cutting back but this is better than a panel full of holes. The outside has a number of small holes or air bubbles but these can be attended to later. The outer edges that were uppermost in the mould are a bit on the thin side in places, so I’ve applied a narrow strip of fibreglass to add a bit more strength. These edges need to be flat and parallel to the outer face.
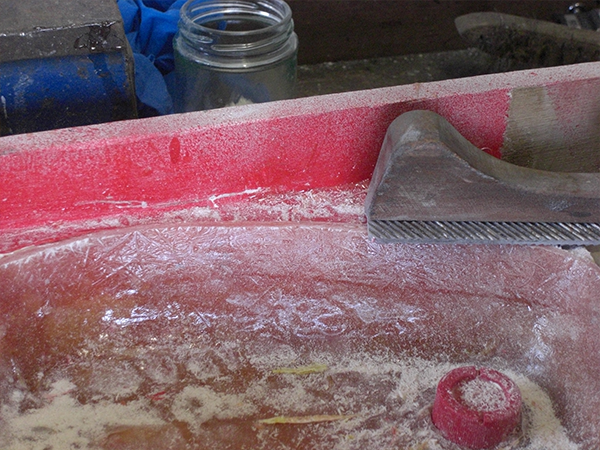
Roughing this out carefully with a coarse file, I find that it’s easier to lay the panel back in the mould as I can judge the eventual height better and the panel is firmly held. Next I can cut the back edges flat by running the panel in circular motion over some coarse (80 grit) sand paper I’ve stuck to an off cut of MDF board with some double sided tape; this gets the edges flat and true quickly.
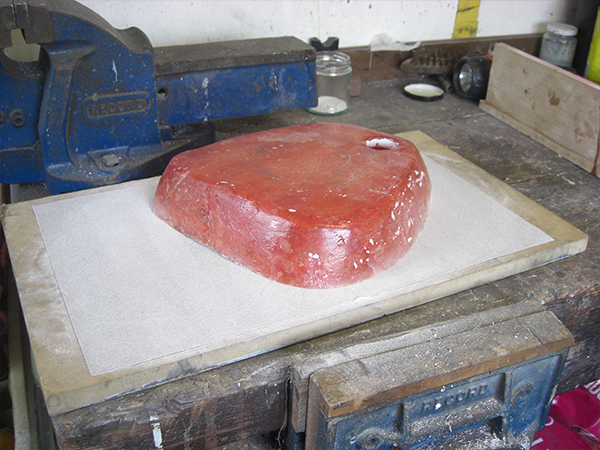
Now would be a good time to see how well the panel fits the bike.
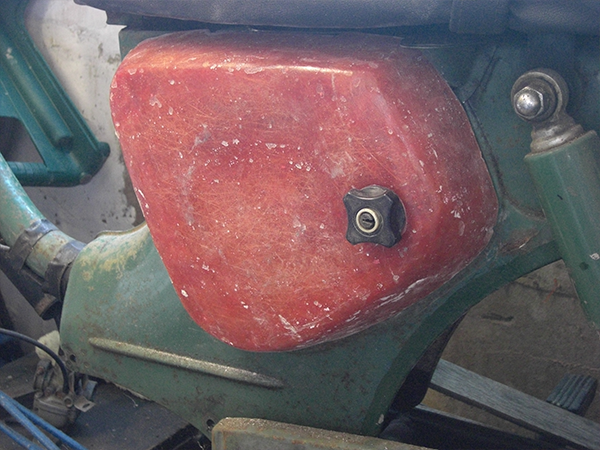
Having cut the mounting slots in the panel with my faithful Dremel a bit of fettling, filing and trimming has the panel mounted using a fitting I’ve robbed from another Yamaha. I’m amazed that it looks so close to the sales brochure picture I have. Of course, it should be the same but it’s a bit of a buzz to think I did this from scratch. Shame the rest of the bike looks so rough.
Next I look for anything resembling an air bubble. Using some good quality filler the panel is spot-filled, ensuring all the holes or depressions are packed from all angles.
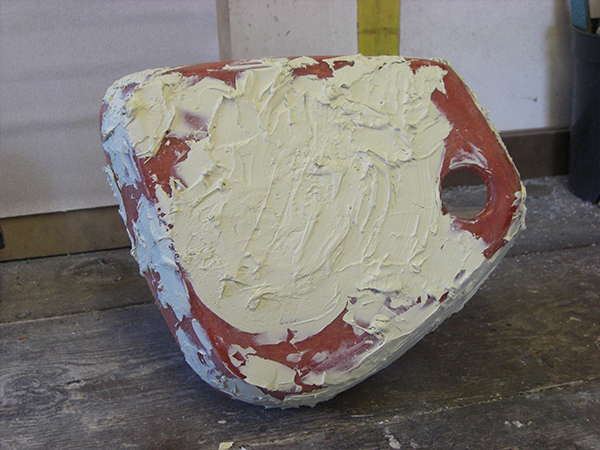
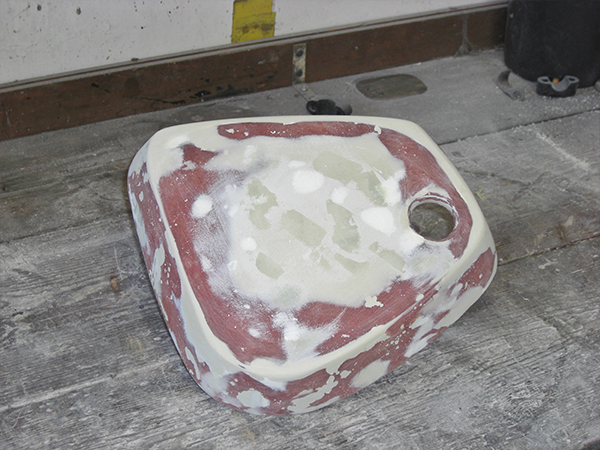
I’ve noticed that the centre of the panel has a bit of a depression so that area gets a good dollop that I can re-profile later. Allowing the filler to cure properly, the excess can be removed initially with a coarse file and then successively finer grades of sand paper. I’ve copped out using my bargain priced, random/dual action, rotary sander. The edges of the panel have also required a touch of re-profiling as my mould making technique has added too much of a radius. However, the overall results are very encouraging.
Conclusion
With the filler rubbed down and a couple of coats of plastic specific high build primer I now have a viable side panel that will allow me to get on with the restoration.
It’s been a bit of a roller coaster learning experience with resin curing while I’m working it, handling materials I’m not familiar with, the panel stuck in the mould and the all-pervasive smell of polyester resin. However it’s been worthwhile; I could do this again reducing the resin batch sizes, be more familiar with the method/materials and know the panel is likely to stick in the mould. This really is proper restoration where you make something from scratch and not simply bolt on another piece of NOS; I’m getting back to basics. Making a panel or similar is not something you’d need (or necessarily want) to do on a regular basis but if this is all that stands between another stalled project and a finished machine, it certainly is a skill worth acquiring.
For more technical advice, visit Motorcycle Workshop Guides: The Complete List.
To find out more about a classic bike policy from Footman James and to get to an instant quote online, visit our Classic Bike Insurance page.
The information contained in this blog post is based on sources that we believe are reliable and should be understood as general information only. It is not intended to be taken as advice with respect to any specific or individual situation and cannot be relied upon as such.

A most useful little blog. Once I am released from covid-prison (Boris says I can go shopping on 1st August) I'll try making a panel for my tricycle!
Davethebeard, 06/07/2020
COMMENT